

Singer sewing machines, known for their powerful motors and heavy-duty components, require precise internal synchronization to maintain their famously fast stitch quality. When issues arise, from skipped stitches to the tangled mess known as birdnesting, the problem is almost always related to one of three mechanical systems.
This guide provides the expert, machine-specific steps to diagnose and fix the most common stitching problems on your Singer machine.
1. The Loose Stitch / Birdnesting Problem
The most common issue is loose, loopy thread on the underside of the fabric, often called “birdnesting.” This symptom suggests the upper thread has no tension.
Re-thread the Top Thread
Do not adjust your tension dial yet. For any Singer stitching problem, first perform a meticulous re-thread:
- Foot Up, Needle Up: Always thread the machine with the presser foot raised (to open the tension discs) and the needle at its highest point.
- The Checkpoint: Ensure the thread is correctly seated in the Take-up Lever (the swinging arm). If the thread jumps out of this lever, all tension is lost, causing the loopiness on the bottom.
If re-threading does not fix the loopy stitches, you likely have a more complex unbalanced tension issue, which requires advanced troubleshooting.
1.2. The Bobbin Tension Test
The Singer bobbin system requires a unique check:
- For Top-Load Drop-in Bobbins (e.g., Heavy Duty 4423): Verify the thread is correctly passed through the small notch/tension spring before being placed in the machine. A misaligned thread leads to zero bottom tension.
- For Front-Load Bobbin Cases: Remove the case and test the thread. Hold the thread tail; if the case drops freely, the bobbin tension is too loose and needs minor adjustment on the side screw.
For detailed care, you must clean this area regularly. Use our guide on how to oil your sewing machine step-by-step for longevity.
2. Skipped Stitches and Thread Breakage (Needle & Timing)
Skipped stitches, where the machine misses forming a lock between the top and bottom thread—are often caused by the needle, not the thread.
Why is My Needle Skipping Stitches on Stretch Fabrics?
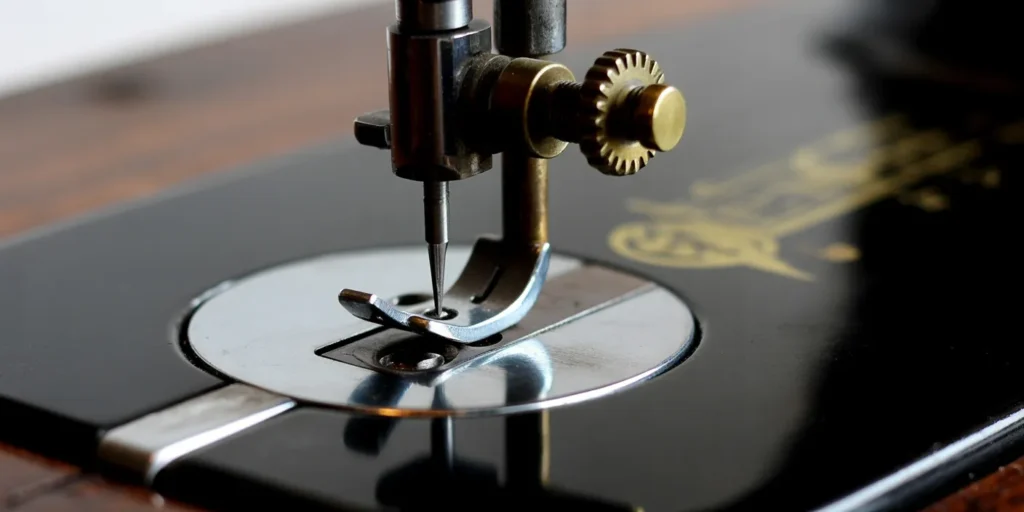
Skipped stitches happen when the Hook (which catches the top thread loop) misses the thread. The primary causes are:
- Wrong Needle: When sewing knits or synthetics, the needle must be a Ballpoint (or specialized Stretch) type. A sharp universal needle can cut the stretchy fibers, causing the fabric to lift and the hook to miss the thread loop.
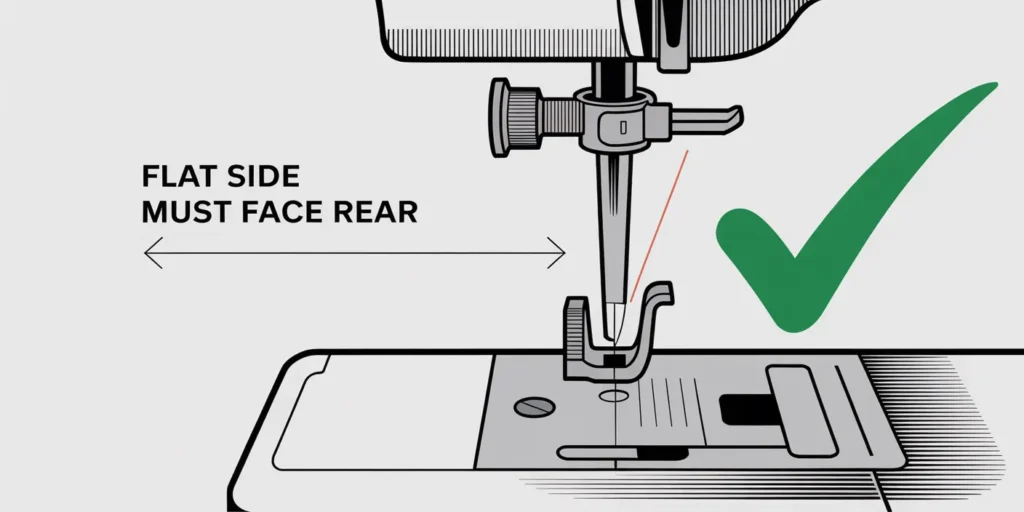
- Incorrect Needle Insertion: On Singer models, the needle’s flat side must face the back and be pushed up as far as it will go before tightening the clamp screw. If inserted slightly too low, the timing is ruined, causing consistent skips.
A bent needle can also cause the machine to slow down. If you notice your sewing machine is running slow, check the needle and machine lubrication first.
When Should I Suspect a Timing Issue?
If you have tried new threads, new needles, and re-threading, but the machine still consistently skips stitches, the internal Needle-to-Hook Timing is off. This requires professional expertise.
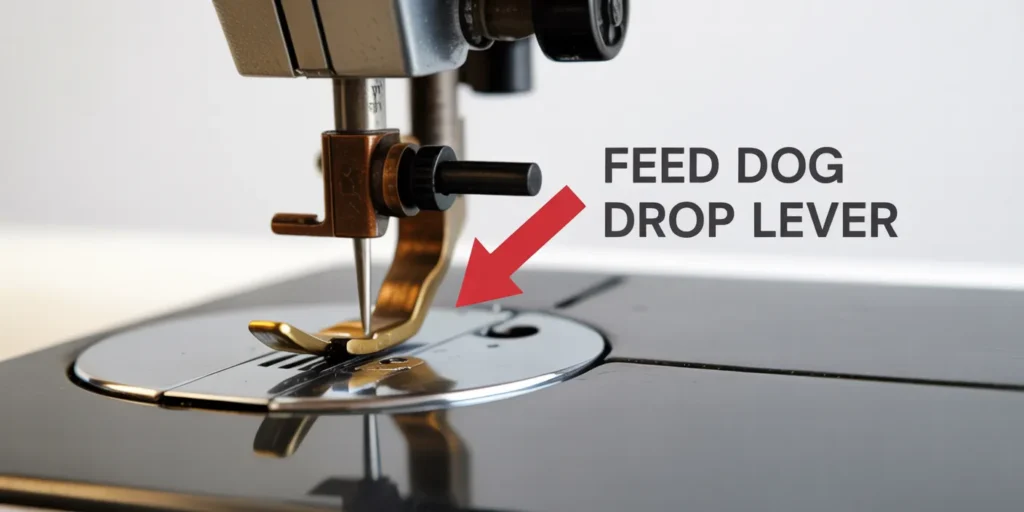
- DIY Fix Attempt: Check that the feed dogs are not partially engaged in the wrong position, especially after adjusting feed dogs for free motion quilting (Pillar 3 cross-link).
- Professional Repair: If the problem persists, take the machine to a service technician. They must adjust the position of the hook relative to the needle entry point.
3. Fixing Stitch Length and Zigzag Issues (Mechanical Checks)
Problems with stitch formation often point to mechanical obstructions in the control assembly.
Why Won’t My Stitch Length Adjust?
If the stitch length dial is stuck or erratic, inspect the area below the stitch plate:
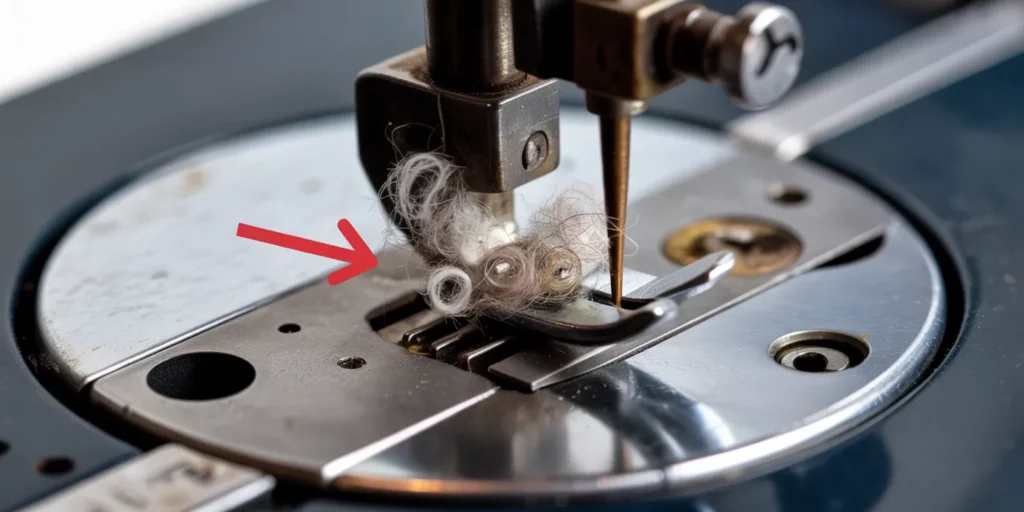
- Lint Obstruction: The most common cause is severe lint buildup and old, congealed oil around the feed dogs and inside the stitch length mechanism.
- Solution : After a deep clean, manually turn the handwheel while sliding the stitch length lever. If it catches, a drop of high-quality sewing machine oil in the mechanism may free it.
Troubleshooting Distorted or Wavy Zigzag Stitches
Wavy or distorted zigzag stitches, particularly on computerized Singer models, may be caused by:
- Accidental Double Needle Mode: Some computerized Singers limit the stitch width when the twin needle is engaged. Check your digital display and ensure the twin needle mode is disabled.
- Incorrect Presser Foot: Ensure you are using a standard Zigzag Foot and that the needle is not hitting the foot (adjust the stitch width dial slightly to ensure clearance).
For problems requiring internal adjustments, familiarize yourself with our complete guide to machine troubleshooting and common fixes
Conclusion: Expertise Solves Singer Stitch Problems
Solving common Singer stitching problems relies on Expertise and following a clear troubleshooting hierarchy: Threading (90%) → Needle/Bobbin (8%) → Professional Timing (2%). By following these methodical checks, cleaning regularly, and ensuring your machine settings match your fabric, you reclaim control over your machine and ensure professional results every time.