
How To Adjust Feed Dogs On A Sewing Machine in 4 Simple Steps
The Feed Dogs are the metal teeth beneath the needle plate that grip the fabric, controlling the Stitch Length and ensuring even fabric movement. Properly adjusting their height and position is critical for preventing puckering on delicate materials and maintaining control on heavy fabrics.
This guide provides the expert, step-by-step instructions for adjusting the feed dogs for specialized sewing tasks.
1. Understanding Feed Dogs: Their Role in Stitch Integrity
The feed dogs execute a precise cycle: they rise up, grip the fabric, move it backward (or forward), and then drop back down below the needle plate before the next stitch. Any deviation in this cycle leads to errors:
- Puckering: If the dogs are set too high, they drag the top fabric faster than the bottom, causing gathering.
- Uneven Stitches: If the dogs are set too low, they lose grip, allowing the fabric to slip and creating inconsistent stitch length.
If you are experiencing uneven stitches but are sure your feed dogs are set correctly, the problem is likely unbalanced thread tension, which you can fix with this guide.
2. Step-by-Step Guide: Adjusting Feed Dog Height
Adjusting the height is the most common modification, often needed when switching between different fabric weights.
Step 1: Preparation and Safety
- Safety First: Turn off and unplug the sewing machine.
- Access: Remove the presser foot and carefully unscrew the needle plate to expose the feed dogs and the internal mechanism.
Step 2: Locate the Adjustment Mechanism
- Consult Your Manual: The location varies. On many mechanical machines (like the Singer Heavy Duty line), the adjustment point may be a small screw located near the bobbin race or on the side/rear of the machine body. Computerized machines may have a dedicated knob or lever.
- Identify: Locate the specific screw or mechanism responsible for the vertical (up/down) movement of the dogs.

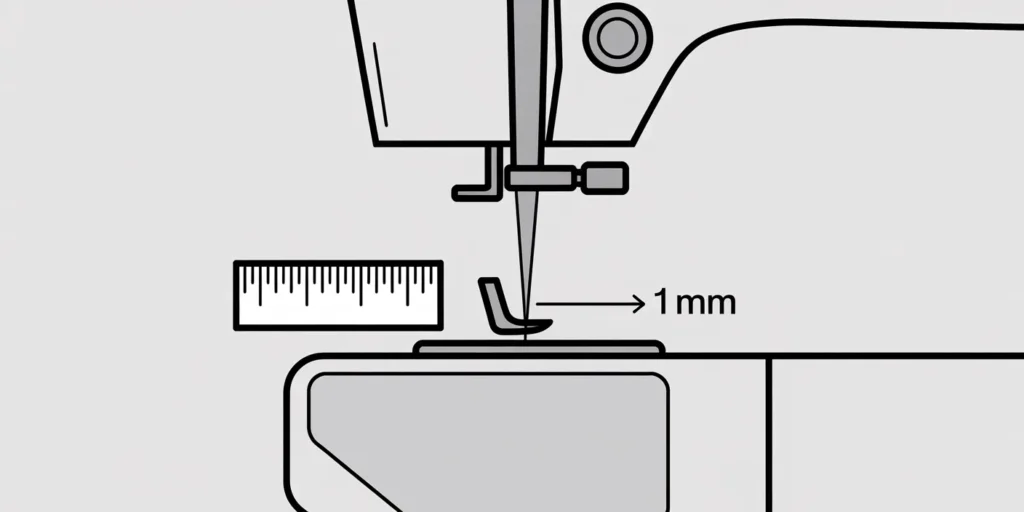
Step 3: Change the Height Setting (The 1mm Rule)
- General Rule: For standard sewing, the feed dog teeth should rise about 1mm above the needle plate slots at their highest point.
- Adjustment: Turn the adjusting screw in small increments (1/4 turn). Clockwise usually raises the teeth (for heavier grip); Counter-Clockwise usually lowers them (for less grip on delicate fabrics).
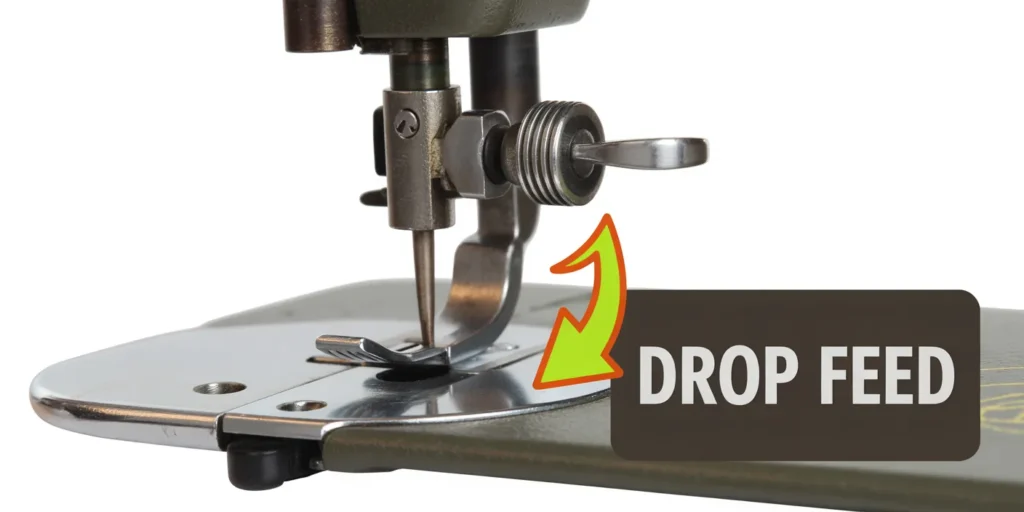
Step 4: Setting the Drop Feed Position (For Quilting)
- The Technique: For darning, embroidery, or Free Motion Quilting, the feed dogs must be fully lowered (or “dropped”) so the fabric can be moved manually.
- Action: Locate the Drop Feed Lever (often near the handwheel or on the side of the machine base) and slide it to the ‘down’ or ‘darning’ position.
If you are working with thick materials, adjusting the feed dogs works best when paired with manual adjustments to the presser foot pressure to ensure proper fabric engagement.
3. When to Change Feed Dog Plates
Some specialized sewing tasks require replacing the entire needle plate and/or the feed dogs for better performance.
- Heavy or Difficult Fabrics (Vinyl, Leather): Consider replacing the standard feed dogs with walking foot feed dogs or a specialized roller foot. This provides superior grip to prevent slippage on non-porous or thick materials.
- Lightweight or Delicate Fabrics (Silk, Chiffon): Use a straight stitch needle plate (or darning plate) that covers the feed dog slots entirely. This prevents the delicate fabric from being pulled down into the large opening, preventing puckering and damage.
4. Feed Dog Maintenance and Care
Proper maintenance is vital because damaged feed dogs can ruin entire projects.
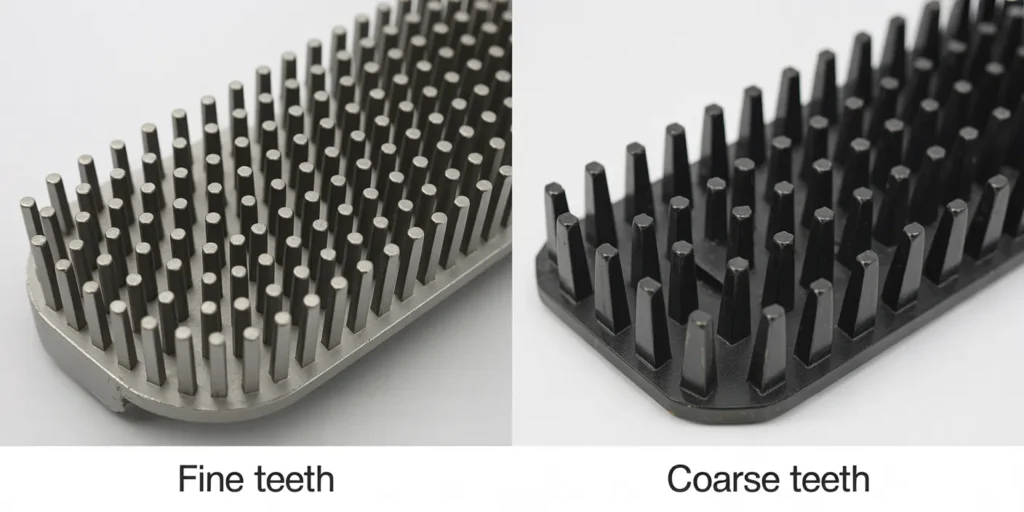
- Cleaning: The feed dog teeth must be cleaned often to ensure a clean grip. Use a brush to remove lint, especially after working with fleece or wool.
- Inspection: Always inspect the teeth for damage. A bent or chipped tooth will leave an obvious mark on the fabric. If damage is found, you must replace the feed dog assembly.
If you have severe clogging issues around your feed dogs, consult our troubleshooting guide for why your sewing machine is running slow—lack of movement is often caused by debris here.
Take Control of Your Machine’s Movement
Adjusting the feed dogs is a fundamental maintenance skill that demonstrates true Expertise over your machine. By learning to adjust the height for optimal fabric grip and utilizing the drop feed function for techniques like quilting, you gain precise control over your stitch quality and move beyond the limitations of factory settings. Mastering this step is key to advancing your sewing results.